Sunday 29 March 2015

Cut Your Scrap Time in Half

Pinnable Graphic

Hello again!

 One of the biggest roadblocks scrapbookers seem to encounter (besides missing mojo - ha!) is a crowded schedule that leaves little time to actually scrap. Today I've got an easy solution for you to try the next time you have a few minutes and want to crank out a page.
All you'll need is three different patterned papers cut into 2 rectangles and 1 square. Scraps are fine - you may recognize these pieces from my "Killer Stash Kit."
4 x 6 Rectangle
4 x 6 Rectangle
4 x 10 Rectangle
4 x 10 Rectangle
8 x 8 Square
8 x 8 Square
You'll also need one piece of 12 x 12 solid cardstock or tone-on-tone patterned paper. From these, you can create at least 5 different layout variations, and from each of those, you can get four slightly different looks by simply rotating the page.
Variation 1
Variation 1
Variation 2
Variation 2
Variation 3
Variation 3
Variation 4
Variation 4
Variation 5
Variation 5
Note: These are only examples. There are MANY ways these pieces could be combined to make the basic layout.
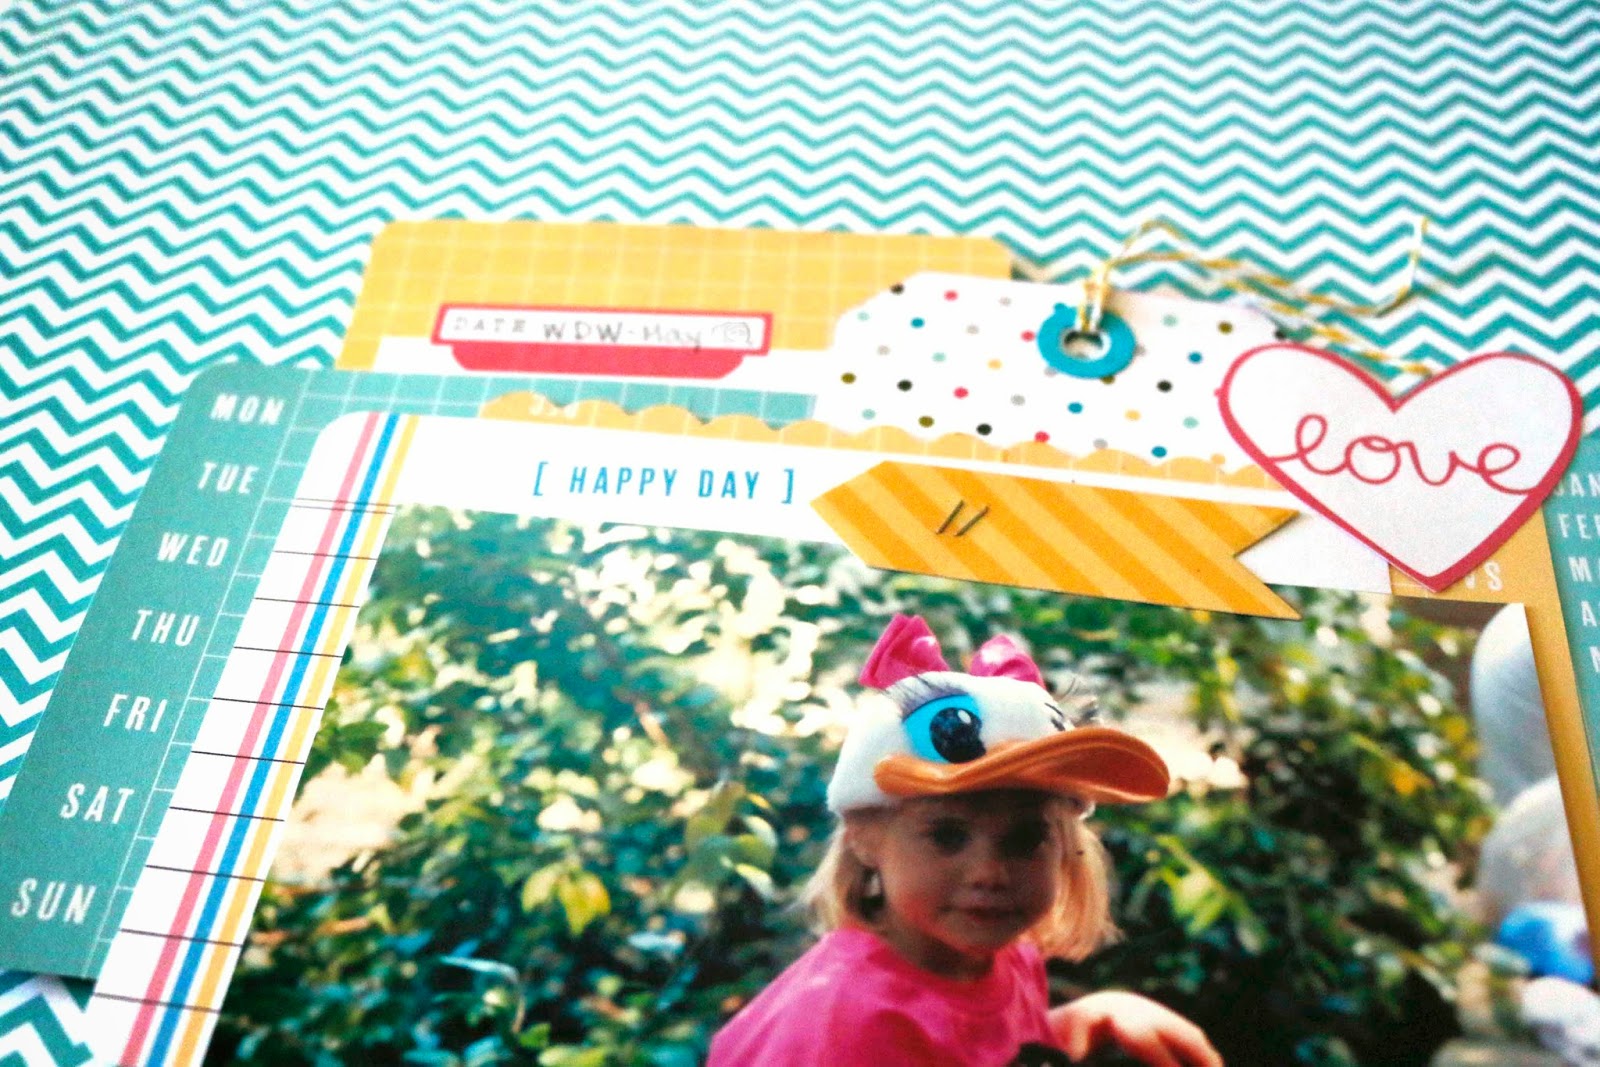
I chose Variation 1 to create this layout about my bestie:
Layout

And used the corners created by the paper layers to guide the placement of my embellishments.
Detail 1
Detail 3

Detail 2

There you go - a super-easy, super FAST way to scrap a page. I'd love to see your creations using this process. Please leave me a comment below linking to your work.

And, if you'd like to discover how to build a killer stash kit from your existing stash, be sure to grab my free e-book 10 Easy Steps to a Killer Stash Kit.

Scrap Your Scraps Design Team Member

Wednesday 25 March 2015

Quilts

I love so many different hobbies but always come back to scrapping.  So guess it the next best thing is to try and combine them on a page.  So this month I got inspired to "quilt".... not physically on a page but rather the look and feel.

For my page I found a pad of 6x6 papers that I had never used... yay for using something old out of my stash! I selected a few and cut some rectangles out of them and a few flags for the banners.  Next I played around with the arrangement and once happy, stuck everything down.  Now for the quiliting... I just grabbed a white pen and my stitching template and drew in the remaining block. Finally I added in my photos, some stickers and journalling.

So this was actually a simple page to put together but very effective.  You could also try this with hand or machine sewing as well.

I might even be more inspired next time to try a complex patchwork pattern... let's see where this challenge takes us.
Scrap Your Scraps Design Team Member

Saturday 21 March 2015

Project Life Cards Layout

I have a stack of Project Life cards, but I found out I really don't use them. Of course I wanted to find a way to incorporate them into my 12 x 12 layouts. I also realized I did not want to do a grid layout.

I first tried a double 8 inch layout; my pet album is this smaller size.


Ok, I know you must think i'm cheating a bit here. I did attempt a full 12 inch layout. As you can see I did get a little more creative this time around


The entire spread was made with PL cards, except the background paper. there is one 4x6 card split in half and tucked underneath. The tag and heart were cut from 3x4 cards.


Scrap Your Scraps Design Team Member


Hello Everyone

I have a lot (and I do mean A LOT!) of PL/Pocket Page Style supplies so this was right up my alley! :)

I used 3x4 cards for this layout from Simple Stories.  It was very simple to put together.  That is what I do love about this type of scrapbooking.  It is so easy and simple to create a page.


I encourage you to use your Project Life / Pocket Page Style papers to create your next layout.

Thanks for stopping by and HAPPY SCRAPPIN'!
Scrap Your Scraps Design Team Member

Tuesday 17 March 2015

Creating a Scene Using Stamps and Dies for a Layout

Hello Everyone

Today's project is based on creating a scene for your layout using stamp sets and dies.  Creating a scene is very popular right now with card making.  I love doing that with my cards lately but I also wanted to get more use out of my stamp sets and dies.  So for this layout I used the same stamp sets and dies that a lot of people would use for card making.  I used all Lawn Fawn products for this layout (the papers however are all Stampin' Up!).

A type of dies in particular might seem to be only for card makers because they are at most 6" long are the border dies.  I stretched their use for my layout for the sand and water section as shown here.

I completed my layout with stamping and colouring some elements that went with layout and used them as my embellishments.  I stamped and die cut my title as well.


I encourage you to take your stamp sets and dies and use them on your layouts.  It's just one more way to stretch your tools to get your money's worth.  

Thanks for stopping by and HAPPY SCRAPPIN'!
Scrap Your Scraps Design Team Member

Friday 13 March 2015

Crop essentials Whats in your Tool kit?

Hi Everyone.  My turn on the blog and this month I wanted to Concentrate on organization. Crop Organization.  I am going to a 3 day retreat at the end of the month.  I get to go to a couple retreats a year.  More if they are local. This one happens to be a 5-6 hr drive away.  But with all the shopping we do along the way it is more like 8 hrs.  I am part of the 50 projects and I am on my 3rd round. So I will be rewarding myself with some scrappy goodies.

For 1 Day Crops I tend to bring my small canvas tool kit with all the basics
ATG tape Runner & refills
12 inch paper trimmer
scissors
Cutting Mat &  Utility Knife

Liquid adhesive
Distress Tools
Punches


Examples of small storage that is in bag
Stamps/stencils
Washi Tape 
stickles gelatos
Inks
Pictures 

This bag is also kept at the bottom of my Fat Max.


For Far away retreats I check to see what supplies will be shared by the organizer sometimes they provide some tools.  It is a good idea to label all your own tools with your name on it.    

My retreat Tool box
To save table space I bring a Fatmax or rolling tool box.
I try to get a spot at the end of the table and open the toolbox up. I pack all my frequently used tools in here.

Here is the top. a Removable tray with chalks, paint brushes, scissors, small tools.
Space under tray holds bulky tools, cropadile,ATG Gun, Stamps.brayer
Divided sections. Inks, blade refills,  Tape refills , glue gun and glue stick, glue, foam pop dots, stickles, gelatos, small containers.
In the bottom I have my small toolbox that holds, paint and other mixed media.  I can also take out and can carry to a scrapbook class if needed. Nonstick mat,  Self healing cutting mat, Score board. 


I don't carry any paper or heavy tools in the fat max.  It can get pretty heavy.  I love that it is durable. I have had mine several years. It wipes clean easily. I also carry heavier bags on the handle when I am rolling in and out of the crops.


Scrap Your Scraps Design Team Member


Monday 9 March 2015

Creating Page Kits

Creating Page Kits Using Your Own Supplies
by Jeanette Giancaspro

Do you spend more time gathering your supplies than you spend actually creating your layout?

Do you have so many supplies that you don’t know where to start?

Do you find yourself spending too much time looking for that “perfect” embellishment?

If you answered “Yes” to any (or all) of these questions, have I got a checklist for you!  

Like so many scrapbookers/stampers/crafters, I have struggled with all of the above.  I have spent more time choosing my supplies than I actually spent creating the project.  I have sat there staring at my shelves and boxes of “stuff” for agonizingly long periods of time.  I have gotten countless headaches from looking through my stash for just the right materials.  I got to the point where I just couldn’t take it anymore!  So I came up with the following checklist to take the pain out of selecting my supplies.  This helps me to create my own page kits for my layouts, just like those expensive kits that can be bought already put together.

Now I spend more time enjoying what I really love:  creating the layout.  I am also using more of the supplies that I already have.  Sometimes I change things up a little, but I try to keep to this list as much as possible.  I don’t always use everything on this checklist, and that’s OK too.  Feel free to adapt it to your own specific needs.  And remember to always be your creative self!


Creating Page Kits Checklist


o   Photos
o   Sketch
o   Patterned paper and cardstock  (3-5 patterned papers and 3 - 4 sheets of cardstock)
o   Specialty papers/transparencies
o   Journaling cards or blocks
o   Washi tape, ribbon, or twine
o   Embellishments (die cuts, veneer, acetate, chipboard, etc.)
o   Small embellishments (brads, enamel dots, rhinestones, sequins, etc.)
o   Letter stickers or rub-on letters
o   Die cut and/or punch any additional shapes and letters.

o   Punch shapes and/or borders.

Scrap Your Scraps Design Team Member

Thursday 5 March 2015

Shape Up! Using Shaped Photos on Your Layout.

Hey everyone it's Cathy here with another post for Scrap Your Scraps!  This month I'm taking a break from my prompt series to bring you something different that has inspired me this month.  Back when I started scrapbooking I remember seeing lots of layouts using circular photos or shaped photos.  It was somewhat popular, but over the years I saw less and less, and more and more it seemed liked it looked a little to cheesy.  Well recently I've seen a resurgence in cut out photos, and in lots of fun new shapes.  Circles are still there, but now there seems to be a lot more diamond and triangle photos taking a spotlight.  For my layout I was inspired by a project at Stephanie Makes.  I decided to try my hand at using shaped photographs.  For my layout I have to say that the hardest part was picking photos and getting them cropped just right.  After I had them printed it was smooth sailing!


I went with the same simple grid design as my inspired layout since it would be the easiest way to line up all the photos and showcase some pretty papers.  I used some watercolours first to do a light colour wash in the background first.  I laid out my design and played around with my photos and paper until I liked my design.  Although I was using a grid design I didn't really bother with measuring and making sure everything was perfect.  I love the way this turned out and am eager to try some other shaped photos.

Scrap Your Scraps Design Team Member

Related Posts Plugin for WordPress, Blogger...